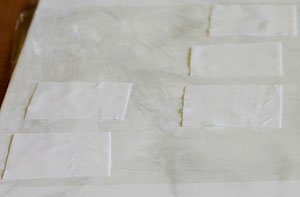
From your block of translucent clay, cut a piece thin enough to go through the pasta machine on the thickest setting. (If it’s too hard or crumbly, pre-condition as necessary, but remember that over-conditioning bleached translucent clay / “Frost” may introduce more air and increase plaquing in the final product.) Continue putting the clay through the pasta machine on progressively thinner settings until it is as thin as possible (without tearing). If you don’t have a pasta machine, roll the clay very thinly with a brayer.
 Place the sheet of clay on your work surface. (I prefer to cover my ceramic tile with a sheet of plastic wrap to prevent the thin sheets of clay from sticking to the tile. This also makes cleaning up easier. Wax paper will work for this purpose, too.)
Cut the clay into small, equal-sized rectangles. When cutting your rectangles, keep the following two things in mind:
1. The size of your rectangles depends on the size you want your finished mokume gane block to be. Even a modestly sized mg (mokume gane) block can yield a lot of “veneer”, so you may want to start small. If you keep a record of the materials and colors you use, you can always follow the recipe and make another, larger mg block, later on.
2. The number of rectangles you need depends on the number of paints and other materials you plan to use. You can use as many as you like, but keep in mind that the more you use, the more variety there will be among the slices you take from the mg block. For instance, a block with only three colors or materials will have those three repeated closer together in the block than in a block with nine different colors or materials. This is neither a good thing nor a bad thing, but you may have a preference, depending on the project you have in mind.
In this instance, I used five separate colors/materials, so I needed six rectangles. You’ll always want one rectangle more than the number of materials you use. Set the extra rectangle of clay aside so you won’t forget to leave it “blank”.